Screw pile foundations are a great solution for many types of construction projects. While they’re different from traditional foundations, they still serve the same purpose by providing a level surface on which to build. Here’s an overview of what it takes for Screw pile installation:
Installing the Screw Pile
If a screw pile foundation is your preferred choice, then it’s time to dig. You will need to excavate the ground where you would like to install your foundation. If there is any dirt or rock in the soil, it’s best to remove this first before proceeding with excavation of deeper layers of soil.
Once you have excavated enough space for your foundation, use a backhoe or other excavating equipment to dig down about 1 foot deep into the ground. The purpose of doing so is so that when each pile is installed into this area, there will be plenty of room for them without running into any existing structures such as pipes or wires that may be buried beneath the surface of your yard or garden plot.
You’ll also want to make sure that each screw pile goes deep enough through solid bedrock so that they provide adequate support against any outside forces acting on your structure (such as earthquakes).
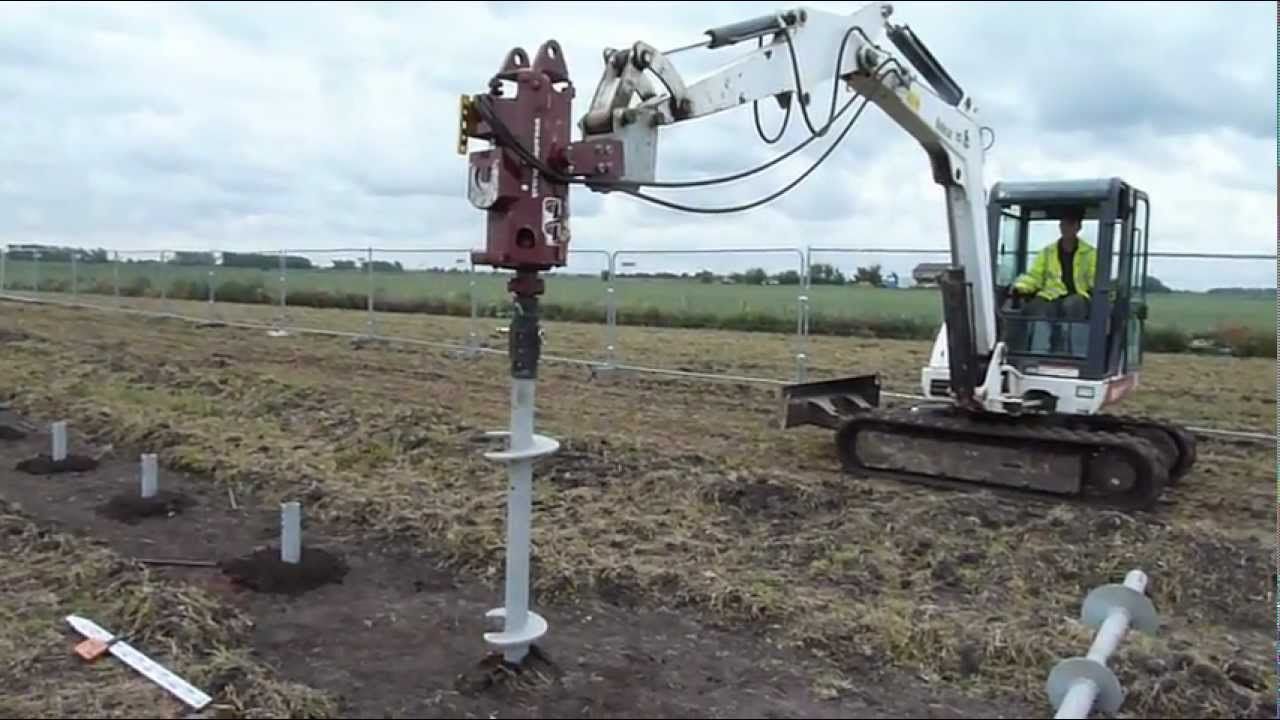
Screwing in the Pile
For screw pile installation, you will first need to determine the length and width of your foundation. You can do this by using a measuring tape. For example, if you want to dig out the ground in an area that is 6 ft by 8 ft for a basement foundation and then install 4-inch thick concrete block walls around it, then you would need a screw pile that is at least 9 feet long and 6 inches wide (if made from steel).
Next, place one end of your casing into the ground at an angle until its tip touches the bottom of your desired location for your foundation wall. A casing is essentially just a hollow tube with threading inside so that screws can be screwed through it easily when installing them on top of the casing base below ground level. The last part we’ll cover here is how to use this casing pipe as part of your screw pile system:
Checking the Pile Alignment

- Use a level to check the pile alignment. If you don’t have a level, use your eye and judgement to make sure that the pile is straight with both the horizontal and vertical planes.
- Check for any obvious signs of damage or defects. If there are any cracks or dents in the pile, this needs to be fixed before continuing with installation.
Threading the Materials into Place
When the pile is threaded into place, it’s very important to make sure that you follow these steps:
- Screwing the pile into the ground. This can be done by hand or with a power screwdriver. The goal is simply to get a firm grip on what will be your foundation, so you want it embedded in soil that is at least 6 feet deep and has good drainage. If there are rocks beneath this depth, use a pickaxe to break them up and then remove them before proceeding with your installation.
- Checking alignment and depth of installation after every two or three turns of screws; checking rotation after each turn; checking plumbness (vertical alignment) after each turn until you reach full depth of embedment; thoroughly cleaning out any dirt from around threads before continuing on with other activities.
Conclusion
Threading in the pile is a simple task that can be done by most people. It’s important to make sure your screw pile installation is done correctly, so that it will last for years to come. If you want more information on this topic or need someone who can help with your own project, contact us today!